I Tried Algokit So You Don’t Have To — Getting Started with Smart Contracts
I’ve always like Algorand, you can tell from my last blogs it’s my blockchain of choice for development. What’s great is that they’ve recently released (AlgoKit)[https://developer.algorand.org/docs/get-started/algokit/]. Creating smart contract is easier than ever, or so they say.
What is Algokit?
AlgoKit is the primary tool used by the Algorand community to develop smart contracts on the Algorand blockchain. It provides the capabilities to develop, test and deploy Algorand smart contracts within minutes! This guide is intended to help you set up AlgoKit and start developing your application.
Let’s see what it’s like.
Setup
Prerequisites for Algokit are:
- Python 3.10 or higher
- PipX
- Git
- Docker
- VSCode
Once these are installed, you’re good to go. For this I used the Windows Subsystem for Linux (WSL). I setup a Python virtualenv and create the boilerplate.
python3 -m venv venv
source venv/bin/activate
pip install algokit
You should now be able to run Algokit on the command line.
(venv) alex@DESKTOP:algokit-example$ algokit --version
algokit, version 1.0.1
Once we’ve ensured Docker is running. We can start our own local algorand network.
(venv) alex@DESKTOP:algokit-example$ algokit localnet start
Starting AlgoKit LocalNet now...
docker: Container algokit_postgres  Created
docker: Container algokit_algod  Created
docker: Container algokit_indexer  Running
docker: Container algokit_postgres  Starting
docker: Container algokit_algod  Starting
docker: Container algokit_postgres  Started
docker: Container algokit_algod  Started
docker: Container algokit_algod  Waiting
docker: Container algokit_indexer  Waiting
docker: Container algokit_postgres  Waiting
docker: Container algokit_algod  Healthy
docker: Container algokit_indexer  Healthy
docker: Container algokit_postgres  Healthy
Started; execute `algokit explore` to explore LocalNet in a web user interface.
This will start the relevant docker containers. You can see these in Docker Desktop. We can then initialise our directory. Algokit asks you all the relevant questions to get started.
(venv) alex@DESKTOP:algokit-example$ algokit init
? Select a project template:  beaker_starter
     Official starter template for Beaker applications.
? Name of project / directory to create the project in:  example
Re-using existing directory, this is not recommended because if project generation fails, then we can't automatically cleanup.
? Continue anyway? Yes
Starting template copy and render...

🎤 Package author name
   Your Name
🎤 Package author email
   test@test.com
🎤 Do you want to add VSCode configuration?
   Yes
🎤 Do you want to use a Python linter?
   Ruff
🎤 Do you want to use a Python formatter (via Black)?
   Yes
🎤 Do you want to use a Python type checker (via mypy)?
   Yes
🎤 Do you want to include unit tests (via pytest)?
   No
🎤 Do you want to include Python dependency vulnerability scanning (via pip-audit)?
   No
Template render complete!
? Do you want to run `algokit bootstrap` for this new project? This will install and configure dependencies allowing it to be run immediately. Yes
Poetry not found; attempting to install it...
? We couldn't find `poetry`; can we install it for you via pipx so we can install Python dependencies? Yes
Bootstrap failed. Once any errors above are resolved, you can run `algokit bootstrap` in /mnt/f/Code/algokit-example/example
? Would you like to initialise a git repository and perform an initial commit? No
🙌 Project initialized at `example`! For template specific next steps, consult the documentation of your selected template 🧐
Your selected template comes from:
➡️  https://github.com/algorand-devrel/starter-algokit-beaker-template
VSCode configuration detected in project directory, and 'code' command is available on path, attempting to launch VSCode
This will give us a default HelloWorld App. It simple takes a name variable and outputs “Hello, {name}”. All the comments below have been added by me. There are no comments in the starter beaker template.
from beaker import *
from pyteal import *

app = Application("HelloWorld") ## Initialise the beaker application with an App Name

@app.external ## This lets the application know this is external i.e can be called by anyone
def hello(name: abi.String, *, output: abi.String) -> Expr:
    # Anything left of the * is an argument, anything right is the output of the function
    return output.set(Concat(Bytes("Hello, "), name.get()))

# This is a call to delete our contract once deployed.
# Bare is confusing as a new smart contract developer.
# I believe this is saying it will only "route" the OnComplete function of the app
# therefore don't call anything else other than the OnComplete command of this contract.
# Authorize is defining who can call the method, i.e the creator of the smart contract
@app.delete(bare=True, authorize=Authorize.only(Global.creator_address()))
def delete() -> Expr:
    return Approve()

if __name__ == "__main__":
    # The build method will build the code. Export will export the relevant information
    app.build().export("./artifacts")
Let’s run it and check everything works.
(venv) alex@DESKTOP:algokit-example/example$ python3 app.py
Traceback (most recent call last):
  File "/mnt/f/Code/algokit-example/example/app.py", line 1, in <module>
    from beaker import *
ModuleNotFoundError: No module named 'beaker'
Weird, it didn’t install beaker, it also doesn’t install pyteal. Let’s do that.
Edit: A helpful reader pointed out, these didn’t install because I was lacking poetry, which is the package manager used by Algokit.
(venv) alex@DESKTOP:algokit-example$ pip3 install beaker-pyteal pytealWe can then run the example and see what’s output
(venv) alex@DESKTOP:algokit-example/example$ python3 app.py
(venv) alex@DESKTOP:algokit-example/example$ tree
.
├── app.py
├── artifacts
│   ├── application.json
│   ├── approval.teal
│   ├── clear.teal
│   └── contract.json
├── deploy.py
├── poetry.toml
├── pyproject.toml
└── README.md

1 directory, 9 files
We’ve now got the artifacts folder, with some files. The Teal files are source code for the different functions we defined in python. These are low level languages that will be deployed onto the blockchain.
The JSON files are ABI files, where contract is an ABI JSON representation and applications is an extended ABI JSON representation. ABI files are Application Binary Interface which define the template for interacting with the teal functions e.g which arguments go where, global state etc.
Deploying The Application
We have a compiled application, now let’s deploy it to our local blockchain and see if it works.
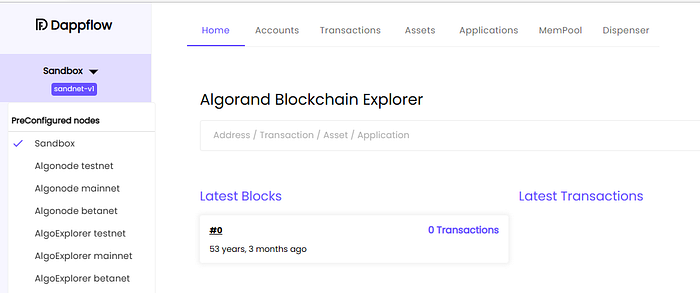
(venv) alex@DESKTOP:algokit-example/example$ algokit explore
Opening localnet in https://app.dappflow.org using default browser
Algokit Explore will start dappflow which is a web interface to help deploy smart contracts. I was using WSL so this didn’t automatically open a browser. If you go to: https://app.dappflow.org/explorer/home and select “sandbox” on the drop down. That will also work.
First we need to create a development wallet with some Algos. If you navigate to “Dev Wallets”. Click create wallet — it will create a wallet and dispense 100 Algos.
Then on the bottom left, click “Connect Wallet”. Then click the bottom option “Dev Wallet”. Your screen should now look like this (but with different wallet addresses)

Great, we can now deploy our app. Head over to “Beaker Studio” on the left panel. Select App -> Import beaker app -> File -> Upload File. Select artifacts/application. You should see a page like this.
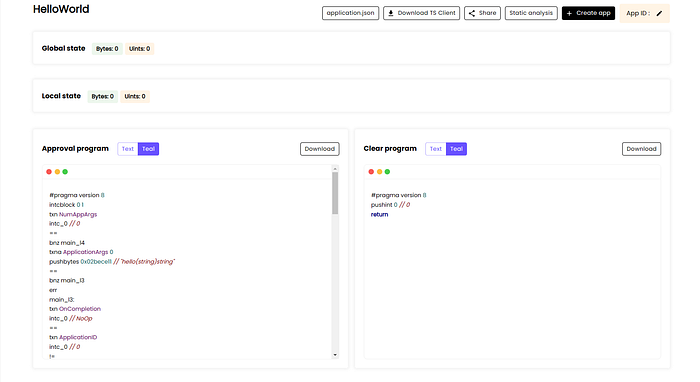
All of this information was obtained from the application.json file we previously mentioned which had the ABI information. You can then click “create app” at the top right to deploy your application.
If you scroll to the bottom of that page, you should see what looks a bit like documentation on how to call your app. This is similar to swagger if you’ve ever used that for rest apis before.
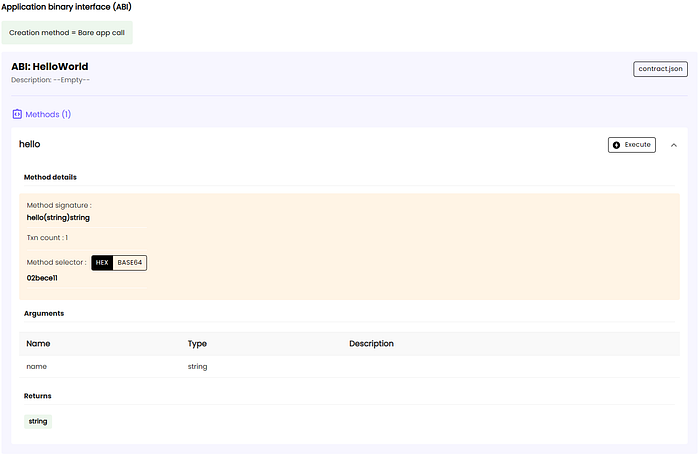
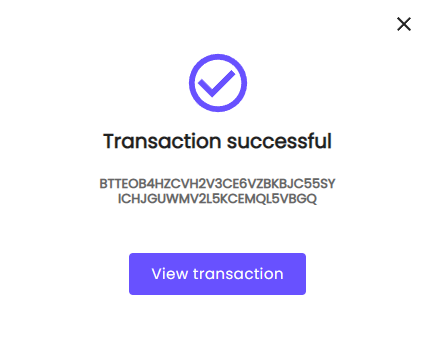
You can now click “Execute” and test out our app.

We’ve now got a working app on LocalNet!
Thoughts
The process of going from nothing to deployed Dapp on LocalNet was super painless. Algokit does a lot of the heavy lifting allowing you, as the devleoper, to focus on the code and checking it works.
I already like Algokit and hopefully, from this and the next two parts. You will too!
This series will consist of 2 more parts:
- Create a voting DApp
- Deploy our DApp to Mainnet
If you want to find more information. Algokit documentation is here: https://developer.algorand.org/docs/get-started/algokit/
Beaker Documentation is here: https://developer.algorand.org/docs/get-details/dapps/writing-contracts/beaker/

